I’m Rhys, the lead developer of Cart Catch. We’re a cart abandonment service for WooCommerce (totally free forever, try it out). This document explains, from start to finish, how to set up Cart Abandonment emails in WooCommerce.
I’ve built and shipped a few WooCommerce plugins before, including WooToApp – a native app experience for WooCommerce stores, and PayItLater, a pay by instalments payment gateway for Australian stores.
This article is about setting up cart abandonment emails in WooCommerce using Cart Catch. It should take you a few minutes to read, and a few minutes to implement.
Assumptions
I’m going to make some assumptions about your website and environment before moving forward too much more. This will ensure you don’t get stuck halfway.
1. You’re on WooCommerce. Yes, we need to make sure.
2. You have access to wp-admin, and permission to set up a solution that will email your potential customers. You’re comfortable installing a new plugin.
Installing the plugin
Installing the plugin is the easiest bit.
1. Sign in to the WordPress admin console of your website (usually at yourwebsite.com/wp-admin/)
2. Hover over “Plugins” on the left and press “Add new”
3. Search for “Cart Catch”, and when you see Cart Catch for WooCommerce – cart abandonment, hit “Install Now”, and then “Activate” when it’s finished.
We’re about halfway now. The next step is to create an account over at cartcatch.com
Create a Cart Catch account
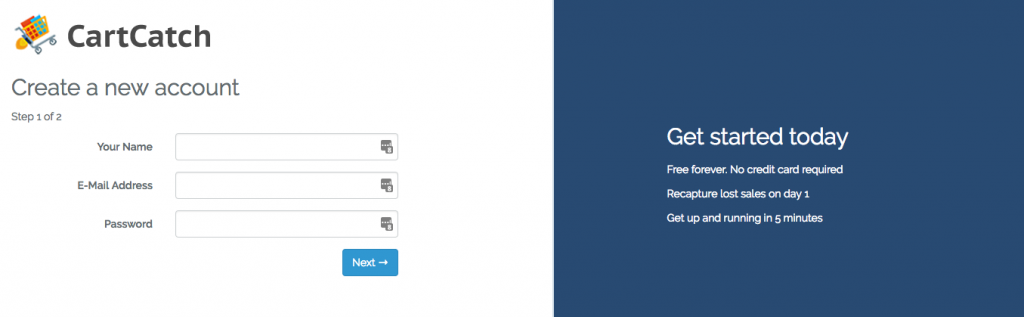
Head on over to https://app.cartcatch.com/register to create your account.
We only need bare essential details like website URL, name, email address.
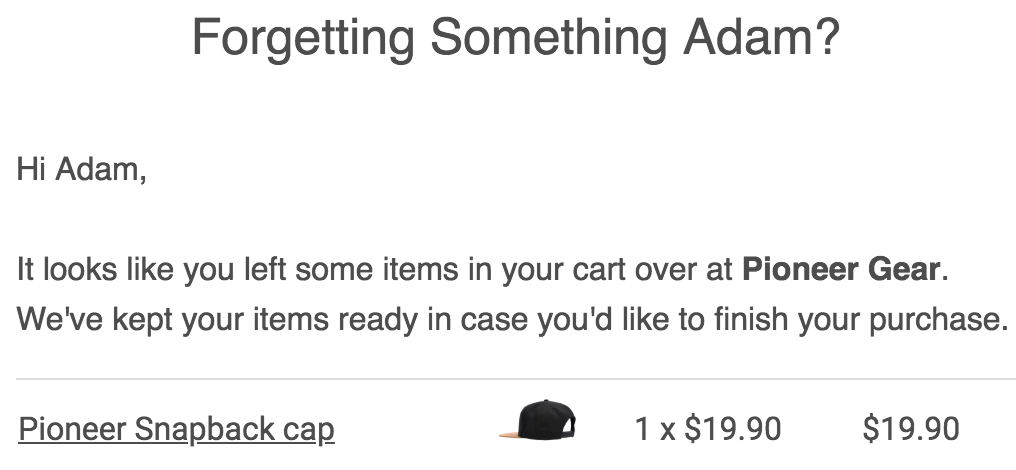
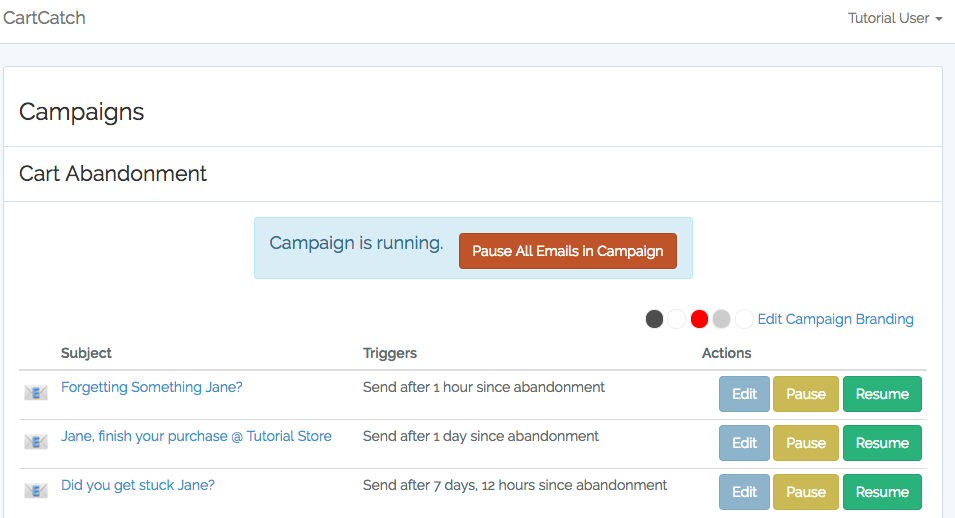
Once you hit ‘Register’, we’ll sign you straight in to your dashboard. Your cart abandonment emails are set up ready to send, we’ve pre-filled your store name, email and email copy.
Check your inbox, you’ll have an email from Cart Catch with a store ID and secret key in it. You’ll need these next.
Connect Cart Catch to your site
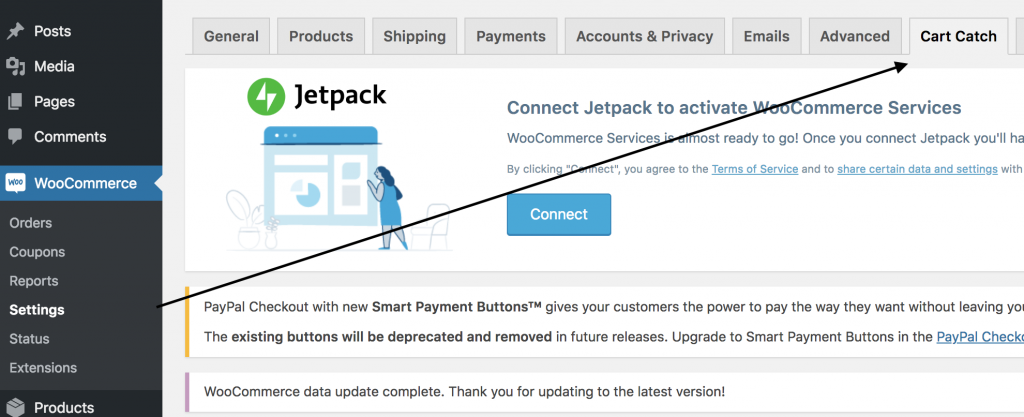
Head back to your WooCommerce store. Go to “WooCommerce” in your admin dashboard, and then “Settings”. In the tabstrip along the top is a “Cart Catch” tab. Tap that, and enter your Store ID and Secret Key there. The easiest way is to copy and paste them from the email.
Hit “Save Changes” when you’re done. That’s it, Cart Catch is live!
Abandoning a dummy cart
This part is really important so you get to see, from a real customer perspective, what Cart Catch is and how we can improve conversions for your store.
We’re going to abandon a real cart on your store, and watch the pipeline occur in real time. Hopefully, as a store owner, you do this very regularly anyway. It’s so easy for a bad code push to lose you a handful of sales without you ever noticing.
Open a new incognito window on your browser. We want no cookies, no stored passwords, no items in the shopping cart. On Chrome, you can hit Shift + CTRL + N or Shift + Apply Key + N.
Visit your store, and add a few items to a shopping cart. Head all the way to checkout. Enter all of your details — first name, last name, email, billing address. Now pretend you got spooked by shipping prices and close the tab.
That’s all we need to get started. In 10 minutes, we’ll send an email to your email address gently reminding you to finish checking out.
Resuming a dummy cart
Here’s where things get interesting, and you get to try out a unique feature of Cart Catch (or a feature of super expensive competitors at least…).
Find a different device that has your email on it.. Usually your cell phone. Open the email from <Your store name>, and tap on the ‘finish checking out’ button.
We’ll go all the way to the checkout page on your store, prefill all your details, ready to check out! Across sessions, devices, and cookies, it’s all ready to go.